Showing posts with label DIY beauty. Show all posts

Wednesday, February 13, 2013

DIY Lip Scrub

Remember when I told you the internet is your friend when it comes to trying something new?

Well, this is yet another instance where  that is proven to be true.

You see, I wanted a lip scrub. I desperately need one year round because I'm the type of person that forgets chapstick. I also lick my lips constantly and never drink enough water. Needless to say, my lips are pretty much always in a state of dryness and in desperate need of exfoliation.

I found some awesome lip scrubs at Lush, but they were messy and expensive. If you have the money, they are a great investment. But the scrubs, made mostly of sugar, flavor, and some vitamins, still wouldn't solve the problem of my chapped lips.

To my rescue, Pinterest! I searched until I found one that used items I had in my pantry. After all, what's the point of saving money by making a DIY if you have to spend an arm and a leg on the product to make said DIY?

You can find this recipe anywhere, but here's my version.

You'll need: Coconut oil, honey, and sugar (I used turbinado sugar). Seriously. That's it.
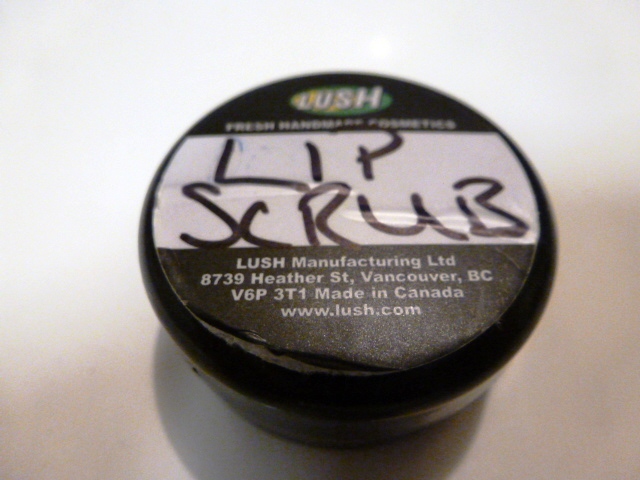
First, you will need a small container. I've heard of people using baby food jars, washed out tea tins, and the like. I choose to make my lip scrub in much smaller batches. Here, I re-purposed an empty sample container from (well, would you look at that) Lush. 
Here is the completed, refrigerated product.

And a pile of the sugary (delicious) scrub on the tip of a nail.

My recipe, you ask? My method? Well, to tell you the truth, I didn't really follow one. Sure, the first time I did. But I thought it was way too much scrub for me, there wasn't enough sugar, and there was way too much honey.

So I played around a bit until I got it exactly the way I wanted it. I added the sugar first, then the warmed up coconut oil, then the honey. I kept working in small increments until it was just what I wanted.

And that's okay! You can find a recipe and then tweak it to your liking. That's the great thing about DIY: it's completely customizable. Hate coconut oil? Find another oil that you do like. Want some vitamin E? Sure, break a caplet in there. Add some flavor extracts, some color. Whatever you know will work with your body, your skin, your preferences. 

In the end, that's why makeup is awesome. There aren't really hard and fast rules (well, not really). It's all figuring out what works for you. 

Isn't that the best?!

Tuesday, January 29, 2013

Making Your Own Makeup

If you're at all into beauty, you know that one of the big deals right now is to have a tinted moisturizer or a tinted primer under all the other stuff.

But here's a big secret: I don't wear primer. Ever. I am lucky enough to have skin that holds onto makeup all day with little need for refreshing. For those of you who have oily skin or skin that just can't seem to like makeup, primer is a good choice.

The problem is that it can get a little pricey.

And for me, my moisturizer is pretty expensive as well. After all, I use an all natural moisturizer with no parabens or artificial chemicals. And the cost of natural is high.

So when I read about a brilliant way to stretch that moisturizing dollar, especially during the winter months when I have to slather it three or more times a day, I was so totally game.

And now, I'm going to share that tip with you guys.

The trick to make expensive moisturizers last longer without decreasing their effectiveness is this: make your own tinted moisturizer.

That's right. And you want to know what? It's really not that hard. In fact, I can make a small pot of mine every morning and it only adds about 30 seconds to my routine time. Which is always a plus when I'm in a hurry (which is every day).

Here are some tricks that I've picked up on since starting this.

First, use a healthy amount of moisturizer. Use a little less than what you would use on your face.

I found that this spare contact case that I had floating around was the perfect size to hold one or two days worth of my handmade tinted moisturizer. Making it that often keeps it fresh so you aren't using stale makeup on one of the most sensitive areas.


Next, add about the same amount of liquid foundation as you would use on any given day. Use more if you want more coverage, but generally, this amount is just right.

And last but not least, stir! Make sure that all of the moisturizer is mixed in with the foundation, and you don't have any spots where one is more concentrated than the other. That will cause streakiness and uneven placement of the makeup.

 Now, when you use this, not only are you making your foundation winter ready by adding moisturizing capabilities, but you're stretching out how much moisturizer you use in the morning by making your makeup do double duty.

Mixing in your moisturizer will make sure that your makeup stays longer by helping it soak into the skin. It looks sheerer and more natural, and using it this way makes it nearly impossible to get that icky cakey skin look.

When I first started getting into makeup, I was terrified of looking like I was wearing makeup. You know those people. The ones who look like they have a pound of makeup covering their skin, which only makes their flaws that much more noticeable.

My foundation wasn't really getting used until I started mixing it with my moisturizer because it felt so heavy. Even a good foundation can feel heavy for me. But this makes it light and comfortable. Sometimes, I'll have to get out of bed at night because I forgot that I was wearing makeup and so hadn't taken it off. Most people don't even know I'm wearing makeup. They just think I look airbrushed naturally. Which, hey, no complaints here!

Try out your own combinations and let me know how it works out for ya!

Thanks for reading!